[macOS] Automatically screenshot upload
At Dogtronic, we use the convention that a server is used to share screenshots or recordings between team members. Each developer has their own directory to which they can upload files and share them with the world. The preferred tool to automate this process is usually ShareX. It’s a great tool that does all the hard work for us, but it has a downside – it only works on Windows.
When I switched to macOS a few months ago, I found that simply sharing screenshots with colleagues was quite a challenge. I checked out programs like CloudApp and Skitch, but unfortunately they didn’t meet my expectations.
So I came up with a crazy idea – what if I did everything myself?
Purpose and tools
I started the challenge by setting goals to clarify my own requirements for the tool I am creating. They are as follows:
- using the native keyboard shortcut Cmd + Shift + 4
- switch between 'select fragment' and 'select window' modes
- set your own file name with the option to use a date or generate a random name
- automatic sending of a file to the server and generating a leaf
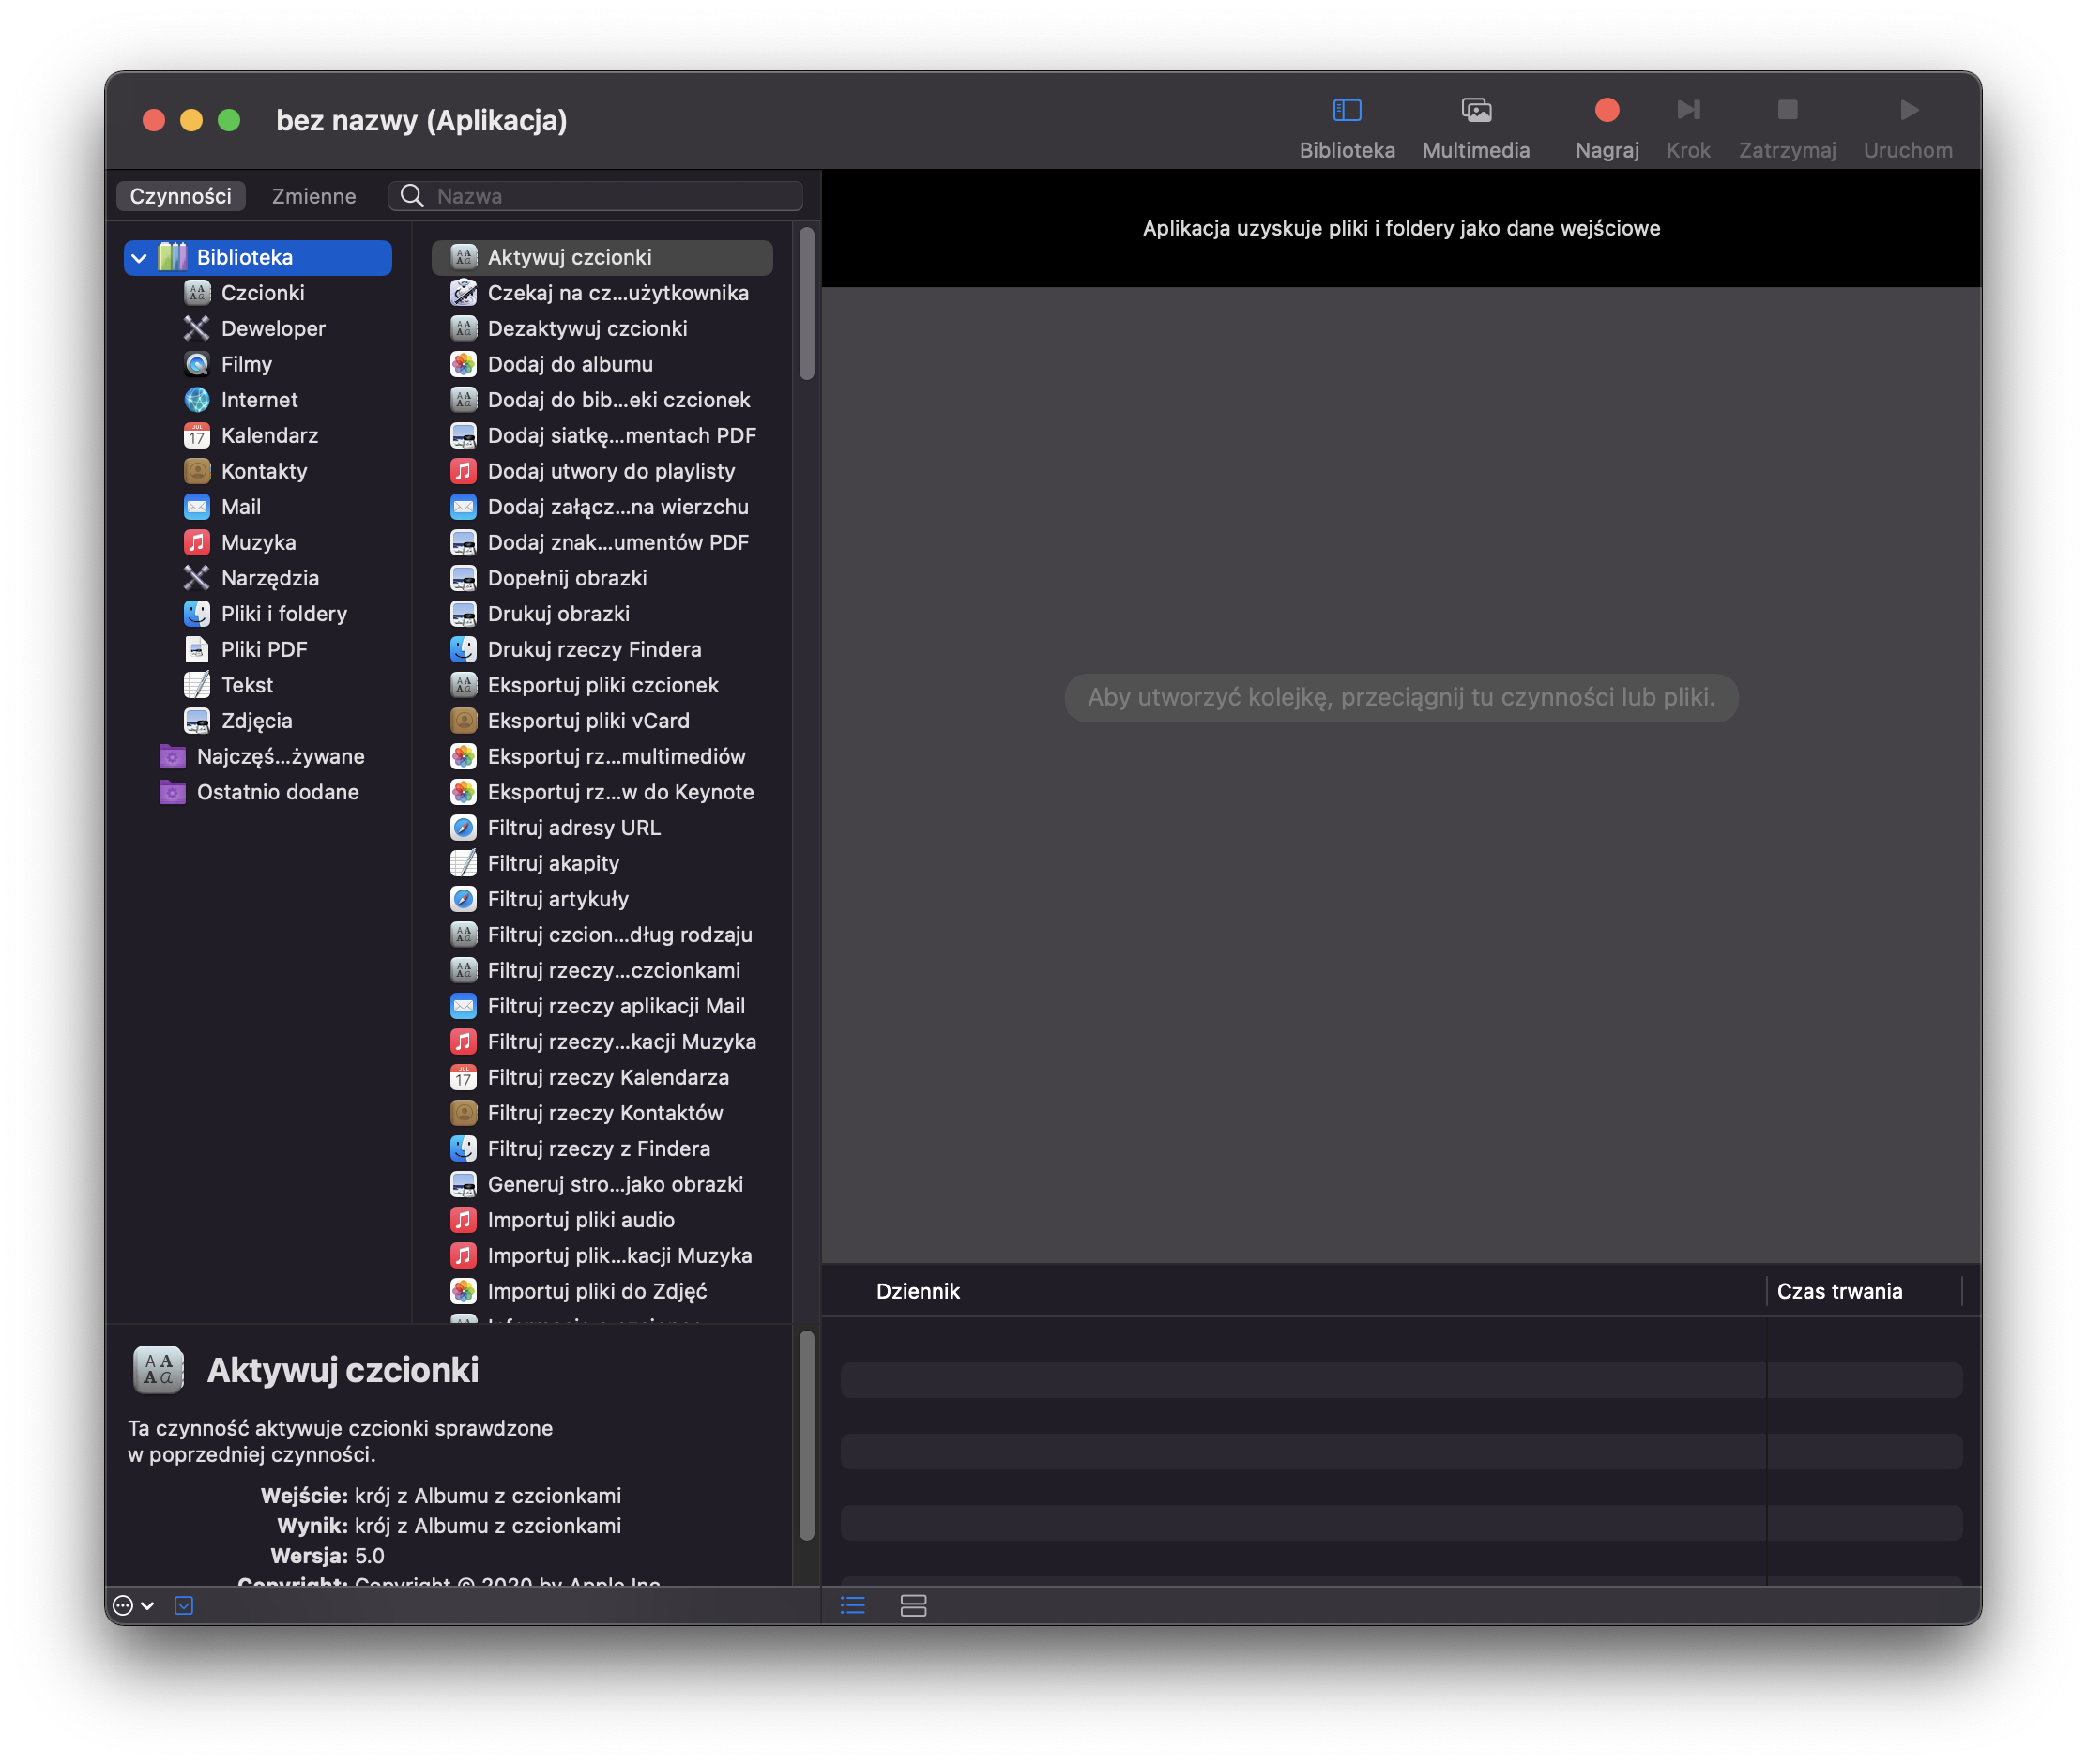
To complete the task, I used Automator, a tool for automating tasks in MacOS. We start by creating a new application by choosing File -> New -> Application.
Creating a screenshot
In the first place, we need to take a screenshot. An amazing surprise. To do this from within the shell we use the screencapture command.
screencapture -i ~/Desktop/tmpScreenshot.png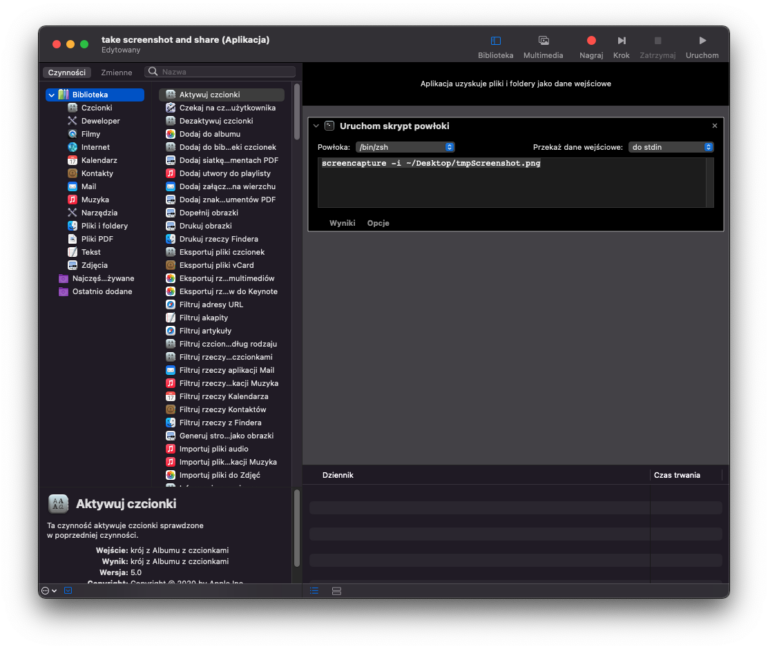
From the menu on the left in the Automator window drag the Run shell script option. Choose the shell you want (in my case it’s zsh) and call the command that will take a screenshot and save the image on your desktop.
Choosing a file name
The second step will be to write a simple script in AppleScript that will be used to select a file name or cancel an operation.
on run
	set cryptname to do shell script "openssl rand -hex 10"
	set datename to do shell script "date -ju +%Y-%m-%d_%H.%M.%S"
	set cryptbutton to "Use \"" & cryptname & "\""
	display dialog "Filename (extension will be added automatically)" default answer datename buttons {"Cancel", cryptbutton, "OK"} default button "OK" cancel button "Cancel" with title "New screenshot"

	if button returned of result is cryptbutton then
		return cryptname & ".png"
	else
		return (text returned of result) & ".png"
	end if
end run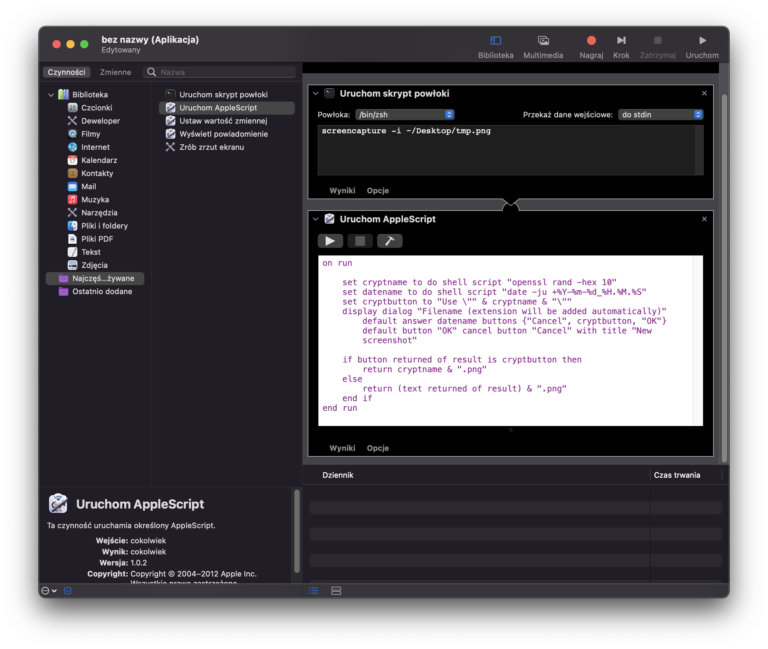
I won’t go into the AppleScript syntax itself here, because that’s not what this article is about, but I will shortly describe how the presented script works.
We start by creating a random file name using openssl and retrieving the current date using date. AppleScript here allows us to execute scripts on the shell and assign their results to variables.
Next, we create the dialog that will be displayed to the user. It presents itself as follows:
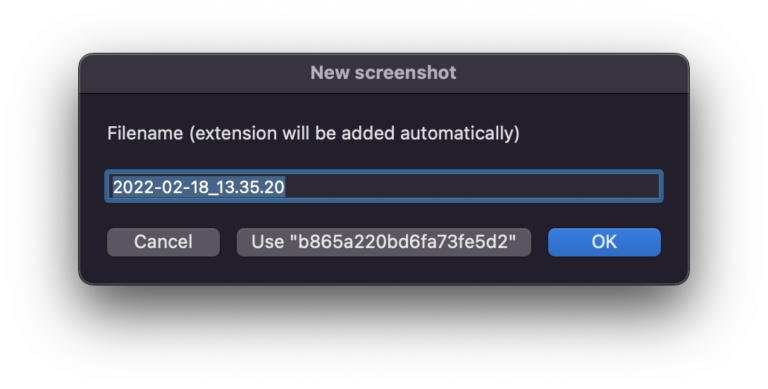
At this stage we can choose a file name or cancel the operation. The whole thing starts to take shape.
Uploading files to a server
I admit that here I had the most problems, but it may be because I set myself the goal of making a script in a technology with which I had virtually no contact. Therefore, for sure there will be some shell master who will say that it can be better, but as they say, if it works, it works.
export PATH=/usr/local/bin:$PATH
HOST='0.0.0.0'
URL='url.com'
USER='user'
PASS='pass'
PORT=2252
REMOTEPATH="/remote/path/$1"
LOCALFILE="/Users/user/Desktop/tmpScreenshot.png"
sshpass -p $PASS scp -P $PORT $LOCALFILE $USER@$HOST:$REMOTEPATH
rm "$LOCALFILE"
echo "https://$URL/$USER/$1" | pbcopy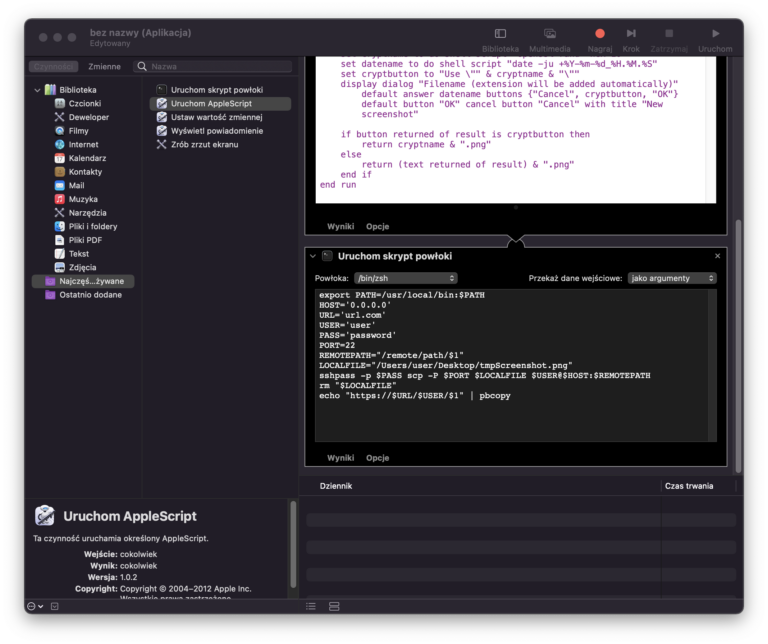
It’s important to pass the input as arguments, so we’ll use the file name you specified earlier using the variable $1. Replace all the variables with the values you want. We will now use sshpass (which you will probably have to install) and scp, which is a standard command used to send files via ssh. After uploading the file to the server, delete the temporary file from your desktop and copy the URL to your clipboard.
Display notifications
The last step will be to display a notification that the operation was successful and the link was copied to the clipboard. There is no philosophy here.

This was the last thing to do in Automator. It remained to name the script and save it.
Assigning a keyboard shortcut
The hardest part is behind us. In order to assign a script to a keyboard shortcut, go to System Preferences -> Keyboard -> Shortcuts. Here, first find the native shortcut assignment Cmd + Shift + 4 and change it. I simply added control to the mix.

Then in services, we select our script and assign it to the selected keyboard shortcut.

And you’re done! Everything should work flawlessly. In any case, it works for me.
Summary
It’s certainly not a perfect solution, but it’s enough for my needs. The whole thing took me 4 hours – I didn’t have any experience with Automator or AppleScript before. I don’t know if it’s a good result, but finally I’m satisfied,
Feel free to improve and modify the script (some error handling maybe, this one?) and share your work results in the comments.
At Dogtronic we put emphasis on learning together and motivating each other to self-development, even in the case of challenges like this one, send a scan to the server. If you also like to experiment and be creative, please visit the Career tab.
Karol Ścibior
Full-Stack TypeScript Dev | Everything Node.js related | Casual DevOps with Docker & Github Actions